How to Add a Portfolio to Your Freelance Services Website (So Clients Hire You Faster)

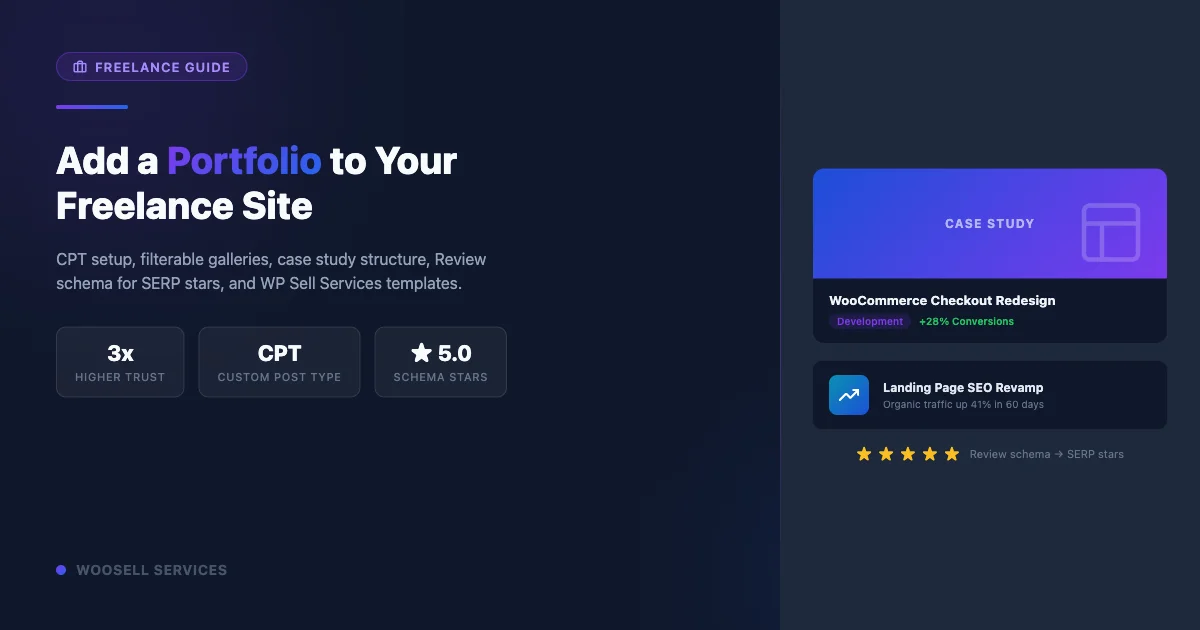
Service pages tell clients what you do. A portfolio shows them what you have already done. That gap matters more than most freelancers realize. When a prospective client reads “I build high-converting landing pages,” they have no frame of reference. When they see three case studies with before-and-after screenshots, conversion lifts, and a real client quote, the decision becomes easy. This guide walks you through every layer of adding a portfolio to a WordPress-based freelance services site, from registering a custom post type to adding Review schema so search engines show star ratings next to your listings.
Why Portfolio Pages Convert Faster Than Service Pages Alone
A service page answers one question: what can you do? A portfolio page answers a different and more urgent question: have you done it for someone like me, and did it work?
Buyers who reach the decision stage are not looking for promises. They are looking for evidence. A 2023 Edelman Trust Barometer report found that peer proof (case studies, testimonials, logos of past clients) outweighs brand claims by a factor of roughly 3 to 1 in B2B purchasing decisions. Freelancers are a one-person brand, which means every piece of social proof carries even more weight.
There are three specific reasons portfolio pages outperform service pages in conversion:
- Specificity beats vague claims. “Increased sales by 34% in 60 days for a Shopify apparel store” is infinitely more persuasive than “I help businesses grow online.” Specificity is a proxy for competence.
- Story creates emotional buy-in. A case study structured as problem, approach, result, quote, and measurable outcome mirrors the client’s own situation. They see themselves in the story before they ever send an inquiry.
- Visual proof removes doubt. Before-and-after screenshots, annotated mockups, or embedded Loom walkthroughs compress the trust-building timeline from weeks to minutes.
The practical implication: add a portfolio section and link it prominently from your services page, your homepage hero, and your contact form. Do not bury it in the navigation. If you are still figuring out how to sell web design services on your own website, set that foundation first, then layer in your portfolio.
Registering a Portfolio Custom Post Type in WordPress
WordPress does not ship with a portfolio post type out of the box. You have two paths: register one manually in your theme’s functions.php (or in a site-specific plugin), or use the CPT UI plugin for a no-code approach.
Option A: Register the CPT in functions.php
Add the following to your theme’s functions.php file or, better, to a small custom plugin you keep in wp-content/plugins/my-portfolio-cpt/my-portfolio-cpt.php. Using a plugin keeps your CPT alive even if you switch themes.
function register_portfolio_cpt() {
    $labels = array(
        'name'               => 'Portfolio',
        'singular_name'      => 'Portfolio Item',
        'add_new_item'       => 'Add New Portfolio Item',
        'edit_item'          => 'Edit Portfolio Item',
        'view_item'          => 'View Portfolio Item',
        'search_items'       => 'Search Portfolio',
        'not_found'          => 'No portfolio items found.',
        'menu_name'          => 'Portfolio',
    );

    $args = array(
        'labels'             => $labels,
        'public'             => true,
        'has_archive'        => true,
        'rewrite'            => array( 'slug' => 'portfolio' ),
        'supports'           => array( 'title', 'editor', 'thumbnail', 'excerpt', 'custom-fields' ),
        'menu_icon'          => 'dashicons-portfolio',
        'show_in_rest'       => true,
    );

    register_post_type( 'portfolio', $args );
}
add_action( 'init', 'register_portfolio_cpt' );
After saving, go to Settings > Permalinks and click Save Changes. This flushes the rewrite rules so your new /portfolio/ URLs start resolving correctly.
You should also register a taxonomy for project categories. A web designer might want categories like Branding, UX, and Development. A copywriter might use Landing Pages, Email Sequences, and Case Studies.
function register_portfolio_taxonomy() {
    register_taxonomy(
        'portfolio_category',
        'portfolio',
        array(
            'label'        => 'Project Type',
            'rewrite'      => array( 'slug' => 'portfolio-type' ),
            'hierarchical' => true,
            'show_in_rest' => true,
        )
    );
}
add_action( 'init', 'register_portfolio_taxonomy' );
Option B: Use the CPT UI Plugin
The Custom Post Type UI plugin (by WebDevStudios, 2+ million active installs) gives you a settings screen for building post types and taxonomies without touching code. Install it from the WordPress plugin directory, then go to CPT UI > Add/Edit Post Types. Set the Post Type Slug to portfolio, give it a label, enable Has Archive, and check Show in REST API so the Gutenberg editor works. CPT UI stores its configuration in the database, which means it survives theme changes.
Building a Filterable Portfolio Gallery
Once you have portfolio items entered, visitors need a way to browse and filter them by type. There are three practical approaches depending on your stack.
Approach 1: Isotope.js via a Plugin
Isotope.js is the industry-standard JavaScript library for animated filtering grids. The Essential Grid plugin and the Portfolio Filter Gallery plugin both bundle Isotope. With Essential Grid, you create a grid layout in the plugin’s visual builder, point it at your portfolio post type, and enable category filter buttons. The grid re-arranges with a smooth animation when a visitor clicks a filter. No custom JavaScript required.
If you prefer to load Isotope yourself, enqueue it via CDN and initialize it on a grid container:
function enqueue_isotope() {
    wp_enqueue_script(
        'isotope',
        'https://cdnjs.cloudflare.com/ajax/libs/jquery.isotope/3.0.6/isotope.pkgd.min.js',
        array( 'jquery' ),
        '3.0.6',
        true
    );
    wp_enqueue_script(
        'portfolio-init',
        get_template_directory_uri() . '/js/portfolio-init.js',
        array( 'isotope' ),
        '1.0',
        true
    );
}
add_action( 'wp_enqueue_scripts', 'enqueue_isotope' );
And in js/portfolio-init.js:
jQuery( document ).ready( function( $ ) {
    var $grid = $( '.portfolio-grid' ).isotope({
        itemSelector: '.portfolio-item',
        layoutMode: 'fitRows'
    });

    $( '.filter-button-group' ).on( 'click', 'button', function() {
        var filterValue = $( this ).attr( 'data-filter' );
        $grid.isotope({ filter: filterValue });
    });
});
Approach 2: FacetWP (FWP)
FacetWP is a premium faceted search and filtering plugin that works with any post type. You define facets (taxonomy, meta field, date range) and a display template, and FacetWP handles the AJAX filtering. It is a good fit if your portfolio will grow large enough that visitors need multi-criteria filtering, for example by industry, service type, and budget range simultaneously. FacetWP integrates cleanly with WP_Query-based loops and requires no Isotope dependency.
Approach 3: Jetpack Portfolio
Jetpack includes a built-in Portfolio post type that you can enable under Jetpack > Settings > Writing > Portfolio Projects. It registers the jetpack-portfolio CPT and comes with a shortcode [portfolio] and a Gutenberg block. The filter controls are basic compared to Isotope, but Jetpack’s approach requires zero configuration and works immediately after activation. For a freelancer just starting out, Jetpack Portfolio is the lowest-friction option.
Writing Case Studies That Close Clients
The structure of a case study matters as much as its content. Follow a five-part framework for every portfolio item:
1. The Problem
Describe the client’s situation before they hired you. Be specific about the pain point. “A Shopify store selling handmade candles was averaging a 1.2% conversion rate and losing 68% of visitors at the product page” is a problem statement. “They needed help with their website” is not. The more precisely you describe the problem, the more likely a future client in a similar situation will recognize themselves and reach out.
2. The Approach
Explain what you did, step by step. This section showcases your process and expertise. Clients hire freelancers partly for their thinking, not just their output. Walk through the decisions you made: what you tested, what you discarded, and why you chose the path you did. Include screenshots of wireframes, early drafts, or in-progress work where possible.
3. The Result
State the outcome in numbers wherever possible. Percentages, dollar amounts, time saved, rankings achieved. If you redesigned a checkout flow, state the conversion rate before and after. If you wrote email copy, share open rate and click rate. If the client did not share metrics, you can still describe qualitative outcomes: “launched on time, no revision rounds required, client expanded the engagement to cover three additional pages.”
4. The Client Quote
Ask every client for a short testimonial at project close. One to three sentences is ideal. A good quote speaks to the outcome, your working style, or both. “Working with [your name] was straightforward and professional. The new product pages lifted our conversion rate by 28% in the first month.” Store this quote in the portfolio item’s content and also mark it up with Review schema (covered in the next section).
5. The Measurable Outcome Summary
End each case study with a quick-scan summary box: three to five bullet points with the key numbers. Busy decision-makers often skim before they read. The summary box is what they see first. If it hooks them, they read the full case study. Use a styled div or a WordPress Table block for this section.
Adding a Client Logo Bar to Your Portfolio Page
A horizontal strip of client logos tells visitors at a glance who has trusted you. Even one recognizable name in the strip raises perceived credibility for every other name next to it.
Getting Logo Files
Always use SVG format for logos. SVGs are vector-based, so they stay sharp on retina screens and are tiny in file size (typically under 5 KB per logo). Ask your clients for their brand kit or download SVGs directly from their press page. Tools like Brandfetch (brandfetch.com) have a large library of brand SVGs available for download.
Implementing the Logo Strip
A simple CSS flexbox row works well and requires no JavaScript:
<div class="client-logo-bar">
  <img src="/wp-content/uploads/logos/client-a.svg" alt="Client A logo" loading="lazy" width="120" height="40">
  <img src="/wp-content/uploads/logos/client-b.svg" alt="Client B logo" loading="lazy" width="120" height="40">
  <img src="/wp-content/uploads/logos/client-c.svg" alt="Client C logo" loading="lazy" width="120" height="40">
</div>

<style>
.client-logo-bar {
  display: flex;
  flex-wrap: wrap;
  align-items: center;
  justify-content: center;
  gap: 2rem;
  padding: 2rem 0;
  filter: grayscale(100%);
  opacity: 0.6;
}
.client-logo-bar:hover {
  filter: grayscale(0%);
  opacity: 1;
  transition: filter 0.3s, opacity 0.3s;
}
</style>
Note the loading="lazy" attribute on each image. This tells the browser to defer loading logos that are below the fold until the visitor scrolls near them, which improves your page’s Largest Contentful Paint score. Also note the explicit width and height attributes, which prevent Cumulative Layout Shift by reserving space before the image loads.
The grayscale filter on the container is a common design choice: it keeps the logo bar visually neutral so it does not clash with your brand colors, and the hover transition to full color adds a subtle interactive reward.
Testimonial Schema Markup: Getting Stars in Search Results
Google can display star ratings (rich results) directly in search listings when your page contains valid Review or AggregateRating schema markup. For a freelancer, this is a meaningful conversion advantage: a listing with stars stands out visually and signals quality before the user even clicks.
Adding Review Schema to Portfolio Items
Add a JSON-LD script block to the head of each portfolio item page. You can do this with a WordPress plugin like Schema Pro or Rank Math (which has a built-in Review schema module), or manually via the wp_head hook:
add_action( 'wp_head', 'output_portfolio_review_schema' );
function output_portfolio_review_schema() {
    if ( ! is_singular( 'portfolio' ) ) {
        return;
    }
    $post_id      = get_the_ID();
    $rating       = get_post_meta( $post_id, '_review_rating', true );
    $reviewer     = get_post_meta( $post_id, '_reviewer_name', true );
    $review_body  = get_post_meta( $post_id, '_review_body', true );
    $service_name = get_the_title();

    if ( ! $rating || ! $reviewer || ! $review_body ) {
        return;
    }

    $schema = array(
        '@context'     => 'https://schema.org',
        '@type'        => 'Review',
        'itemReviewed' => array(
            '@type'    => 'Service',
            'name'     => esc_html( $service_name ),
            'provider' => array(
                '@type' => 'Person',
                'name'  => get_the_author_meta( 'display_name', get_post_field( 'post_author', $post_id ) ),
            ),
        ),
        'author'       => array(
            '@type' => 'Person',
            'name'  => esc_html( $reviewer ),
        ),
        'reviewRating' => array(
            '@type'       => 'Rating',
            'ratingValue' => esc_html( $rating ),
            'bestRating'  => '5',
        ),
        'reviewBody'   => esc_html( $review_body ),
    );

    echo '<script type="application/ld+json">' . wp_json_encode( $schema ) . '</script>';
}
Store the rating, reviewer name, and review body as custom fields on each portfolio item (you can use Advanced Custom Fields or simple add_post_meta calls). Test your output with Google’s Rich Results Test at search.google.com/test/rich-results.
Conversion Psychology: Why Specificity Closes Deals
There is a principle in persuasion research that specificity functions as a credibility signal. When someone makes a vague claim, the brain treats it as an opinion. When someone makes a precise claim, the brain evaluates it as a fact. This has direct implications for how you write portfolio copy.
Compare these two statements:
- Weak: “Helped a client improve their WooCommerce store performance.”
- Strong: “Reduced WooCommerce page load time from 4.8 seconds to 1.3 seconds by switching to object caching and replacing three legacy plugins. Add-to-cart events increased 19% in the following month.”
The strong version includes the mechanism (object caching, plugin replacement), the measurement (load time), the comparison (before and after), and the downstream business outcome (add-to-cart rate). A prospect reading this immediately understands what they would be buying: not just “better performance” but a specific set of actions with a trackable result.
Ask yourself for every case study: Have I named the specific tools used? Have I given the before number and the after number? Have I connected the technical work to a business metric the client cares about? If any answer is no, revise the copy before publishing.
Using WP Sell Services Portfolio Templates
If your freelance services site runs on WP Sell Services, the plugin already includes built-in portfolio display functionality designed for the freelance workflow. Rather than building a portfolio CPT from scratch, you can use WP Sell Services’ service pages as the foundation and extend them with portfolio data.
WP Sell Services lets you create individual service listings with pricing, delivery timelines, and package tiers. Each service can link directly to related portfolio items, so a prospect browsing your “WooCommerce Store Setup” service can click through to case studies where you have done exactly that work. This creates a tight service-to-proof loop that outperforms a generic portfolio page sitting in isolation. If you want to understand the full service selling setup, see our guide on how to sell services on WooCommerce without breaking the cart flow.
The plugin also integrates with WooCommerce natively, which means your service orders, invoices, and repeat client management all run through a system you already know. When a client books a service, the transaction is tracked in WooCommerce orders. When you complete the project, you can ask for a testimonial and add the result to a portfolio item that links back to that same service.
For freelancers who want a complete, connected system rather than a collection of separate tools, WP Sell Services is worth evaluating as your central platform. The portfolio display capabilities are already included, and the WooCommerce backbone means you can add advanced features (subscriptions, upsells, discount codes for returning clients) as your business grows.
Before-and-After Showcases for Design, Development, and Marketing
Before-and-after comparisons are among the most persuasive formats in any visual field. They make transformation concrete and immediate. Here is how to implement them across three common freelance niches.
Design Freelancers
Use a side-by-side image comparison slider. The Twenty20 Image Before-After plugin implements a drag-handle slider between two images. Upload the old design screenshot and the new design screenshot, insert the shortcode [twenty20 img1="before.jpg" img2="after.jpg"], and the slider is live. Annotate the key changes with callout text below the slider: “Removed 11 navigation items, reduced visual noise by 60%, headline rewritten to address the primary customer job-to-be-done.”
Development Freelancers
Before-and-after for development work is often about metrics rather than visuals. Present two screenshots side by side: a PageSpeed Insights report before your work and one after. Or screenshot a Google Analytics session duration graph with the date of your launch marked. You can also embed a Loom video walkthrough showing the new feature in action, which keeps the page visual without relying on static comparisons.
Marketing Freelancers
Email marketers can show side-by-side screenshots of old and new campaign templates alongside open rate tables. SEO specialists can embed annotated Google Search Console screenshots showing ranking trajectory from the month engagement started. PPC managers can compare old ad copy versus new copy with CTR numbers annotated. The key principle across all three niches: the “before” makes the “after” land harder. Never skip the before.
Portfolio SEO: Ranking for the Right Keywords
A portfolio that no one finds is a portfolio that does not generate leads. The following SEO tactics apply specifically to portfolio pages and case study URLs.
Image Alt Text
Every screenshot and mockup in your portfolio needs descriptive alt text. Not “image1.jpg” and not generic placeholder text. Good alt text describes what is in the image and ties it to the relevant keyword. For a WooCommerce checkout redesign case study: alt=”WooCommerce single-page checkout redesign with guest checkout enabled, showing 28% conversion improvement”. This serves accessibility requirements and gives image search an entry point to your content.
Case Study URL Structure
Use descriptive, keyword-rich slugs for your portfolio items. Instead of /portfolio/project-12, use /portfolio/woocommerce-checkout-redesign-candle-brand. This slug tells both search engines and human readers exactly what the case study covers before they click. Include the service type and the industry niche in the slug wherever natural. For a freelance developer targeting WooCommerce clients, slugs like /portfolio/woocommerce-speed-optimization-shopify-migration are better than anything generic.
Internal Linking Strategy
Link from your portfolio items to your relevant service pages, and vice versa. This creates a two-way authority loop that helps both pages rank for their target terms. Also link between portfolio items that share a theme. A collection of WooCommerce case studies should have internal links connecting them, keeping visitors moving through your proof content and reducing bounce rate. Search engines treat time on site and pages per session as engagement signals.
Portfolio Archive Page Optimization
Your portfolio archive page (usually at /portfolio/) needs its own title tag, meta description, and introductory paragraph that target your primary service category keyword. For a WooCommerce specialist: title tag “WooCommerce Freelance Portfolio | [Your Name]” and a meta description that mentions the types of stores you have worked with and the outcomes delivered. This archive page often ends up being a strong organic landing page for queries like “WooCommerce freelancer portfolio” or “hire WooCommerce developer examples.”
Technical Implementation Checklist
Before you go live with your portfolio, run through this list:
- Portfolio CPT registered and permalink structure flushed
- Taxonomy created for project categories (at minimum: service type)
- At least three portfolio items entered with full case study content
- Featured image set for every portfolio item
- Filterable gallery working on the archive page
- Client logo bar visible on homepage and/or dedicated portfolio page
- Review schema validated in Google Rich Results Test for at least one portfolio item
- Before-and-after media uploaded with proper alt text and dimensions
- Internal links from portfolio items to service pages (and back)
- Portfolio archive page has a custom title tag and meta description
- All portfolio item slugs are descriptive and keyword-relevant
Putting It All Together
A well-built portfolio is a compounding asset. Each case study you add increases the surface area of situations a prospective client might recognize themselves in. Each testimonial schema block gives search engines another reason to display stars next to your listing. Each before-and-after comparison makes the value of your work tangible to someone who has never met you.
The freelancers who get hired fastest are not necessarily the most skilled. They are the ones who make it easiest for clients to say yes. A structured portfolio, properly linked to your services, properly marked up for search engines, and filled with specific, numbered outcomes, does exactly that.
If you sell freelance services through WordPress, WP Sell Services gives you the service listing infrastructure, WooCommerce-native checkout, and portfolio display capabilities in one plugin. You can spend your time building client projects instead of wiring together a dozen separate tools. Start with three strong case studies, add a logo bar, validate your schema, and you will have a portfolio that outperforms most competitors before you even run a single ad.