How to Create an Engaging Online Community Website for Free: Step-by-Step Guide


Thinking about starting an online community website but worried about the cost or the technical side? You don’t need a big budget or coding skills to launch a space where people connect, share ideas, and stay engaged. The free WordPress stack handles all of it, and the technical bar is far lower than most people assume before they actually try it.
Free sandbox tools like TasteWP let you experiment with WordPress setups before you commit. You can test themes, plugins, and settings in a throwaway environment, troubleshoot quirks, and lock in a configuration you’re confident in before flipping the switch on a real domain. This matters more than it sounds, since discovering a plugin conflict on a live site with real members already registered is a far worse experience than catching it in a disposable sandbox first.

Planning Your Online Community Website
Before setting up your online community, take a step back and define its purpose and goals. Who is your target audience? What kind of content will you share, and what features will keep users engaged? Having a clear vision helps you choose the right tools and plugins to match your objectives. It also ensures a structured platform by setting up a content strategy and moderation guidelines from the start.
Skipping this step is the single most common reason communities stall out within the first few months. A platform with every feature enabled but no clear reason for members to show up twice tends to fizzle regardless of how polished the design looks.
Write down, before touching a single plugin setting, who this community is for and who it’s explicitly not for. A community trying to serve everyone tends to end up serving no one particularly well. Narrowing the audience feels counterintuitive when the goal is growth, but a tightly defined community consistently outperforms a broad, vague one on the metric that actually matters: how many people come back a second time.
Step 1: Install WordPress and BuddyX Theme
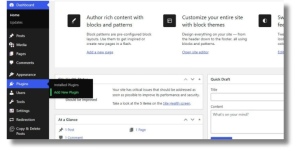
Before anything else, you need a solid foundation. WordPress provides a reliable and user-friendly platform, and the BuddyX theme makes designing and managing your community much easier.
1.1 Search and Install BuddyX Theme
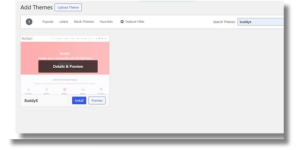
- Log in to your WordPress dashboard.
- Go to Appearance > Themes > Add New.
- Search for BuddyX in the WordPress theme repository.
- Click Install, then Activate.
BuddyX is designed to work seamlessly with BuddyPress, making it the perfect choice for a community-based site.
Alongside the BuddyX and BuddyPress route, it’s worth knowing about BuddyNext, a free, standalone WordPress community platform, an activity feed, member profiles, Spaces (groups), and moderation in one plugin, built as its own modern architecture rather than on top of BuddyPress. Messaging and media come from its free MediaVerse companion, and it scales into memberships and monetization via BuddyNext Pro when you’re ready.
Step 2: Install Recommended Plugins
To make your site more interactive and user-friendly, you’ll need a few essential plugins. Here are the ones you should install.

- Elementor (Optional): A drag-and-drop page builder for easier customization.
- Toolkit (Mandatory): Adds key community features.
- Classic Widgets: Ensures compatibility with older WordPress versions.
Installing Plugins:
- Navigate to Plugins > Add New.
- Search for each required plugin.
- Click Install, then Activate.
Step 3: Install and Configure BuddyPress
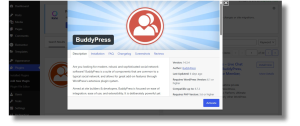
BuddyPress is what turns a basic WordPress site into a fully functional online community with social networking features.
- Navigate to Plugins > Add New.
- Search for BuddyPress, click Install, then Activate.
- After activation, BuddyPress will automatically create pages like Members, Activity, and Groups.
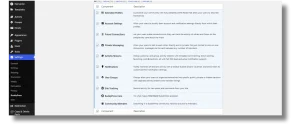
- To fine-tune its settings, go to Settings > BuddyPress, and enable features like:
- Private Messaging – Enables direct one-on-one chats for better interaction. Keeps conversations private and enhances user engagement.
- Activity Streams – Shows real-time updates to keep users engaged. Acts as a social feed for posts, comments, and interactions.
- User Groups – Creates spaces for discussions based on shared interests. Encourages collaboration and niche community building.
Step 4: Generate Demo Data for Testing
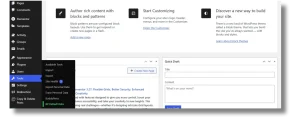
Before going live, it’s smart to test how your site functions. The easiest way is by adding sample data.
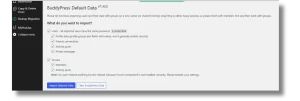
- Install the BuddyPress Default Data plugin.
- Go to Tools > BP Default Data.
- Generate dummy users and groups.
- If you need to remove test data later, use the Clear BuddyPress Data option.
Step 5: Generate Blog Posts for Testing
Blogs are a great way to keep users engaged. To test how the blog section looks:
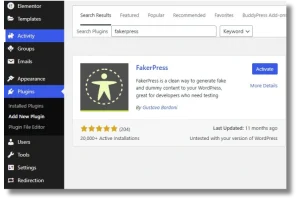
1. Install the FakerPress plugin.
2. Generate 15 blog posts with randomly assigned images.
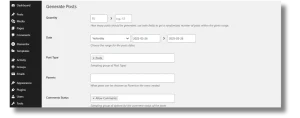
3. If needed, delete these posts later through FakerPress Settings.
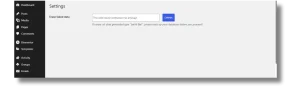
Step 6: Configure Menus and Navigation
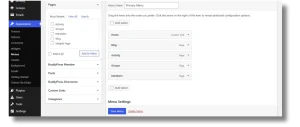
Your site’s navigation should be simple and intuitive so users can find what they need easily.
- Navigate to Appearance > Menus.
- Create a Primary Menu and add the following pages:
- Home
- Blog
- Members
- Groups
- Activity
3. Under Screen Options, enable the BuddyPress Members Menu for user-specific links.
4. Assign the menu under Menu Locations so it displays correctly.
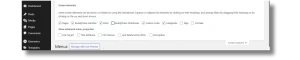
Step 7: Customize Site Identity and Design
Branding plays a big role in how your community feels. Here’s how to adjust it:

- Go to Appearance > Customize.
- Under Site Identity, upload your logo.
- Adjust colors to match your brand.
- Pick readable fonts under the Typography section.
Step 8: Configure Sidebars and Widgets
BuddyX offers multiple sidebars to help organize your community’s content.
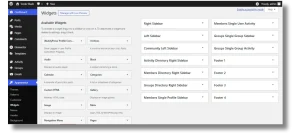
Available Sidebars:
- Community Left Sidebar – Displays key community features for easy access. Helps users navigate discussions, groups, and member interactions.
- Activity Directory Sidebar – Shows recent posts and updates from the community. Keeps users engaged with the latest interactions and announcements.
- Member Directory Sidebar – Lists all registered members in an organized view. Allows users to connect, follow, or interact with others easily.
Adding Widgets:
- Go to Appearance > Widgets.
- Drag and drop Recent Groups, Member Directory, and Login Form widgets into the relevant sections.
Step 9: Adjust Blog Layout and Single Post Settings
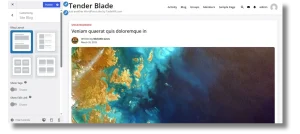
- Go to Customize > Blog Settings.
- Choose a blog layout:
- List View – Displays posts in a vertical list for easy reading. Ideal for text-heavy content and streamlined navigation.
- Thumbnail View – Shows posts with small images beside the text. Balances visuals and readability for quick browsing.
- Grid View – Organizes posts in a structured grid format. Great for showcasing multiple posts at once in an even layout.
- Pinterest Layout – Uses a masonry-style arrangement for a dynamic look. Best suited for visually rich content like images and infographics.
- Configure sidebar settings for blog pages.
- Adjust single post display settings:
- Modify the container width for better presentation.
- Display featured images above post metadata.
- Enable or disable author details.
Step 10: Final Optimization and Launch
Before making your site public, double-check everything:
- Under Settings > Reading, set a static Home Page and a dedicated Blog Page.
- Make sure the 404 error page works correctly.
- Decide whether you want to enable or disable the site loader animation.
- Run tests to confirm that everything functions smoothly.
Choosing the Right Features for Your Community’s Purpose
Not every community needs every BuddyPress feature turned on. A support community for a software product might lean heavily on forums and Q&A, while a paid coaching community might prioritize private messaging and gated group access over public activity streams. Turning on every available feature at launch tends to overwhelm new members rather than impress them.
A useful exercise before launch: list the three things you most want a new member to do in their first session, introduce themselves, join a group, post a question, and make sure the navigation and default widgets point directly at those actions. Anything not directly supporting one of those three goals can wait for a later phase.
Strategies for Sustaining Community Engagement
Launching your online community is just the beginning, keeping it active requires ongoing effort. A proactive approach is key to sustaining engagement. Encourage participation with polls, challenges, and Q&A sessions to create a sense of belonging. Regularly updating content, like blog posts and community announcements, keeps users interested and informed.
Maintaining a positive environment through active moderation helps foster meaningful interactions. Adding gamification elements, such as badges, leaderboards, and membership tiers, can further enhance the experience and motivate long-term participation.

A Hypothetical First 90 Days
The following is a hypothetical, illustrative example, not a real launch, meant to show how community growth typically unfolds in the early months.
Imagine a niche community built around home espresso enthusiasts. Weeks one and two go into the setup covered above, theme, BuddyPress, navigation, and design. Rather than opening registration to the public immediately, the founder invites twenty people from an existing Instagram following as founding members, seeding the activity feed and a couple of groups so the space doesn’t feel empty on day one.
By week six, those twenty founding members have generated enough organic posts and group discussion that public registration opens without the community looking like a ghost town. Weekly recurring content, a Monday “what are you brewing” thread, a Friday gear-review post, gives people a reason to check back on a schedule rather than randomly.
By day 90, the community sits at roughly 150 members with a core group of 15-20 regularly active posters. That ratio, a small fraction of active contributors relative to total membership, is normal for most communities at this stage, not a sign something’s broken. Most online communities, regardless of platform, follow something close to a 90-9-1 pattern: the vast majority read without posting, a smaller group comments occasionally, and a small core drives most of the visible activity. Judging a young community against that pattern, rather than against the assumption that everyone should be equally active, sets more realistic expectations.
BuddyPress Alone vs. a Fuller Community Stack
Straight BuddyPress plus BuddyX covers the essentials, profiles, groups, activity feeds, private messaging, and gets a community live for free. For a lot of use cases, that’s genuinely enough, and adding more plugins on top before there’s real member activity just adds complexity without adding value.
Where the base setup starts to feel limiting is usually around three points: structured Q&A instead of a general activity feed, gamification like points and badges to reward participation, and deeper moderation tools once a community grows past a size where the founder can personally read every post. Each of those is solvable with additional free or low-cost plugins layered onto the same BuddyPress foundation, rather than requiring a switch to a different platform entirely. The advantage of starting minimal is that you only add complexity once you’ve confirmed, with real members, that you actually need it.
Choosing a Niche That Sustains Itself
A community built around too broad a topic, “general discussion for entrepreneurs,” for example, tends to struggle more than one built around something specific enough that members immediately understand who else will be there. “Home espresso enthusiasts” or “freelance graphic designers doing branding work” gives people an instant sense of who they’re joining, which makes that first post far less intimidating than posting into a vague, undefined crowd.
This matters more for a free, self-hosted community than it does for a paid one, since there’s no admissions filter beyond the topic itself doing the work of attracting the right people and quietly discouraging the wrong ones. A useful test before committing to a niche: can you name, specifically, five real people who would join on day one? If that list is hard to fill, the niche may need narrowing further before any of the technical setup work is worth doing.
Common Mistakes to Avoid
Opening registration before there’s any activity to see. An empty activity feed on a new visitor’s first impression is one of the fastest ways to lose them before they’ve even joined.
No clear moderation policy from day one. Writing community guidelines after the first conflict happens, rather than before, tends to look reactive and inconsistent to members watching how it’s handled.
Too many features, not enough reasons to return. Groups, forums, gamification, and a marketplace all sound appealing, but a community with a genuinely compelling reason to check back weekly beats one with every feature switched on and nothing driving repeat visits.
Founder silence after launch. A community where the founder posts once at launch and then goes quiet tends to feel abandoned quickly, even if the technical setup is solid. Consistent presence in the first few months, replying to posts, welcoming new members personally, matters more than any plugin choice.
No mobile testing before launch. BuddyX is responsive out of the box, but custom widget arrangements and third-party plugin additions can break that on smaller screens. A quick pass through the site on an actual phone before announcing the launch catches problems a desktop-only check will miss.
Ensuring Long-Term Success of Your Online Community
By following these steps, you’ll have a fully functional and engaging online community at no cost. Using WordPress, BuddyX, and BuddyPress makes the setup process efficient.
Once your site is live, the focus shifts to building engagement. Keep discussions active, curate valuable content, and update your community regularly. If you need more customization, plugins, and Elementor can take your design to the next level.
The technical setup covered in the ten steps above is genuinely the easy part. What separates a community that’s still active a year later from one that quietly went dormant after month three usually comes down to consistency, someone showing up regularly, responding to posts, and giving members a reason to check back, not the specific plugin stack behind it.
Frequently Asked Questions
Is BuddyPress really free, and is it still maintained?
Yes. BuddyPress is a free, open-source plugin maintained by the WordPress.org community and shipped with regular updates. It powers groups, member profiles, activity feeds, and private messaging, the same core social features paid platforms charge a monthly fee for.
Do I need a paid host to launch a community website?
You can prototype on a free sandbox like TasteWP or InstaWP, but a live community site needs reliable hosting because of the constant database writes BuddyPress generates. Budget-friendly managed WordPress hosting from $5–10/month handles a starter community of a few hundred members comfortably.
How do I keep spam accounts out of my community?
Enable email-based registration confirmation in BuddyPress > Settings, install a free anti-spam plugin like Akismet or Antispam Bee, and require approval for the first post or group join. These three layers stop the vast majority of bot signups without scaring away legitimate members.
How many members do I need before a community feels “alive”?
There’s no fixed number, activity density matters more than raw headcount. A tight community of 50 people posting daily feels far more alive to a new visitor than a stagnant 5,000-member community with a dead activity feed. Focus on getting a small founding group genuinely engaged before chasing total member count.
Can I monetize a BuddyPress community later?
Yes. Paid group access, membership tiers, and sponsored content are all achievable by layering membership or WooCommerce plugins on top of the existing BuddyPress setup. Most successful paid communities start free to build an engaged base first, then introduce paid tiers once the value is obvious to existing members.
How long does it actually take to set up a community site with this method?
For someone comfortable navigating a WordPress dashboard, the technical setup, theme, plugins, BuddyPress configuration, menus, typically takes a weekend. The planning work beforehand, defining the niche, the moderation policy, and the initial content plan, often takes longer than the build itself, and skipping it tends to cost more time later in course-correction.
What happens if my community outgrows the free plugin stack?
BuddyPress and BuddyX scale well into the thousands of members on reasonably priced managed hosting. The point where teams typically look at premium add-ons or a more advanced hosting tier is usually tied to specific feature needs, deeper analytics, advanced gamification, dedicated support, rather than a hard member-count ceiling built into the free stack itself.
Interesting Reads
10 Best Digital Marketing Companies


