How to Add a Free Shipping Progress Bar to WooCommerce

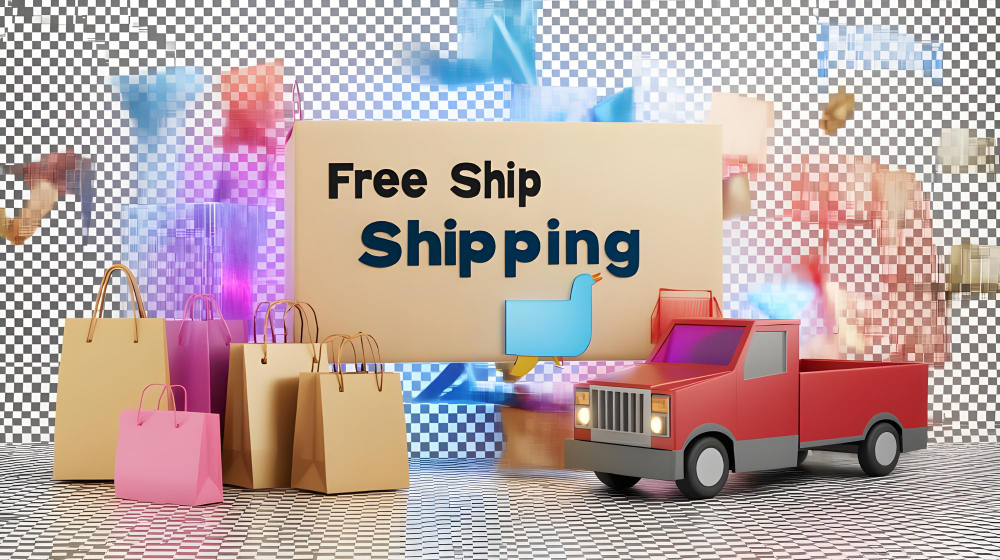
WooCommerce is one of the most powerful and flexible eCommerce platforms available today. While it offers an impressive array of features out of the box, store owners constantly look for ways to improve customer experience and boost sales. One proven method to increase cart value and reduce cart abandonment is by implementing a free shipping progress bar.
This visual cue informs shoppers how close they are to unlocking free shipping and encourages them to add more items to their cart. Whether you’re a seasoned developer or a first-time store owner, this guide will help you make the most of this powerful upselling technique, and points you toward plugins that are still actively maintained in 2026 rather than ones that quietly shut down years ago.

What Is a Free Shipping Progress Bar?
A free shipping progress bar is a visual indicator that shows customers how much more they need to spend to qualify for free shipping. Typically displayed in the cart, checkout, or even on product pages, this bar provides real-time feedback as users add products to their carts.
It serves as a small but impactful motivator. The progress bar taps into basic psychology, when people see they are close to a reward (like free shipping), they are more likely to take the steps needed to achieve it. Think of it as the online equivalent of a retail sign that says, “Spend $50 more to get free delivery!”
A progress bar isn’t just about utility, it adds a dynamic, interactive element to your store, transforming an otherwise static checkout experience into an engaging one. It’s a smart way to increase average order value while simultaneously improving customer satisfaction.
Why Should You Add a Free Shipping Progress Bar to WooCommerce?
Understanding why you should add a free shipping progress bar to WooCommerce starts with the behavior of modern online shoppers. Customers expect free shipping, and many will abandon their carts if it’s not available. Multiple industry surveys have found that free shipping is consistently the single biggest factor shoppers name when asked what would get them to complete a purchase, ranking above discounts and faster delivery in most studies.
Adding a progress bar helps bridge the gap between the customer’s current cart value and the threshold required for free shipping. Instead of feeling like free shipping is out of reach, shoppers feel like they are making progress toward a goal. This sense of progress is powerful, it’s part of what’s known as the “goal gradient effect,” a well-documented behavioral economics finding that people work harder and move faster as they perceive themselves getting closer to a reward.
Moreover, free shipping progress bars can reduce cart abandonment. When used effectively, they guide customers toward the decision to buy more, rather than leave the site. For store owners, this translates directly to higher revenue and better conversion rates.
How to Add a Free Shipping Progress Bar to WooCommerce
Let’s walk through how to add a free shipping progress bar to WooCommerce using both free plugins and simple code snippets. You don’t need to be a developer to get started; however, developers can benefit from more customizable methods if needed.
Method 1: Use a Free Plugin
Several actively maintained plugins make this task a breeze. Worth noting upfront: if you come across an older tutorial recommending “Free Shipping Bar by Beeketing,” skip it, Beeketing shut down its entire suite of Shopify and WooCommerce marketing apps back in 2020, and that plugin no longer receives updates or support. The options below are current and maintained.
Steps to Use a Plugin:
- Install and Activate Plugin:
- Go to your WordPress dashboard.
- Navigate to Plugins > Add New.
- Search for “Free Shipping Bar WooCommerce.”
- Install and activate a plugin of your choice (see the comparison below).
- Configure the Progress Bar:
- Go to the plugin’s own settings screen, most add a dedicated menu item rather than hiding inside WooCommerce > Settings > Shipping.
- Set the free shipping threshold (e.g., $50).
- Customize the appearance, colors, and messages (e.g., “Spend $10 more to get FREE shipping!”).
- Display on Cart and Checkout Pages:
- Choose where the bar will be displayed, most plugins allow you to show it on the cart, product, and checkout pages, and some support the mini-cart/cart drawer too.
- Save the settings.
This method is quick and doesn’t require any coding. However, customization options might be limited depending on the plugin you choose.
Method 2: Add Custom Code (For Developers)
If you prefer more control or want to avoid using plugins, you can add custom PHP and JavaScript code to create a progress bar manually.
Basic Steps:
- Determine the Free Shipping Threshold:
Set a static number (e.g., $50) that the customer must meet. - Create a PHP Function:
Hook into the WooCommerce cart and calculate the current subtotal. - Add CSS for the progress bar:
Use custom styling to show progress visually. - Insert the Bar Into Cart or Checkout Pages:
Usewoocommerce_before_cartorwoocommerce_before_checkout_formhooks.
While this approach provides unmatched flexibility, it requires familiarity with PHP and CSS. If you’re on the newer WooCommerce block-based cart and checkout, these older hooks may not render your markup in the right place, you’ll need to register a Cart/Checkout Block extension through the Store API instead, similar to how any custom block-checkout content needs to be added. If that’s not your forte, stick to the plugin route for ease and efficiency.
Here’s a minimal working example for a classic (shortcode) cart page, added to your child theme’s functions.php, to give you a sense of what the plugin is doing under the hood:
function wss_free_shipping_bar() {
    $threshold = 50; // your free shipping minimum, in your store currency
    $cart_total = WC()->cart->get_subtotal();
    $remaining = $threshold - $cart_total;

    if ( $remaining > 0 ) {
        $message = sprintf( 'Add %s more to unlock FREE shipping!', wc_price( $remaining ) );
    } else {
        $message = 'You have unlocked FREE shipping!';
    }

    $percent = min( 100, ( $cart_total / $threshold ) * 100 );

    echo '<div class="wss-shipping-bar">';
    echo '<p>' . esc_html( $message ) . '</p>';
    echo '<div class="wss-shipping-bar-track"><div class="wss-shipping-bar-fill" style="width:' . esc_attr( $percent ) . '%"></div></div>';
    echo '</div>';
}
add_action( 'woocommerce_before_cart', 'wss_free_shipping_bar' );
Pair that with a short CSS block styling .wss-shipping-bar-track as a rounded background bar and .wss-shipping-bar-fill as the colored fill with a transition: width 0.3s ease for a smooth animated effect. This example intentionally skips AJAX updates for clarity, in production you’d hook into WooCommerce’s cart fragment refresh (woocommerce_add_to_cart_fragments) so the bar updates without a full page reload when a customer adds an item from the mini-cart.
Best Plugins to Add a Free Shipping Progress Bar
While learning how to add a free shipping progress bar to WooCommerce, it’s helpful to know the top-rated plugins that can simplify your workflow. Below are a few standout, currently maintained options:
1. WPC Free Shipping Bar for WooCommerce
Built by WPClever, this is one of the most widely installed free shipping bar plugins on wordpress.org. It offers a free tier with the core progress bar and threshold messaging, plus a paid tier that adds multiple thresholds (spend $50 for free shipping, $100 for a free gift), custom CSS, and display rules by product category or user role.
2. Iconic FSB (Free Shipping Bar)
From Iconic, a well-known WooCommerce extension developer, FSB adds an animated progress bar with configurable colors, icons, and messaging, plus the ability to run different thresholds for different shipping zones, useful if your free shipping minimum differs between domestic and international orders.
3. YITH WooCommerce Free Shipping Bar
YITH’s version integrates cleanly with the rest of the YITH plugin suite if you’re already using their products (wishlist, gift cards, and so on), and includes a “goal achieved” celebratory message once the customer crosses the threshold, a small touch that reinforces the reward.
4. Elex Free Shipping Bar for WooCommerce
A lightweight, budget-friendly option from Elextensions that covers the essentials: a customizable threshold, styling controls, and placement on cart and checkout without extra bloat.
Each of these plugins can help you add a compelling visual motivator without writing a single line of code. Install one on a staging copy of your store first and confirm it renders correctly whether you’re running the classic shortcode cart/checkout or the newer block-based versions, since not every plugin in this category has caught up to the block checkout yet.
Design Tips for Your Free Shipping Progress Bar
Once you’ve figured out how to add a free shipping progress bar to WooCommerce, the next step is to ensure it looks and functions well on your site. A well-designed progress bar should blend seamlessly with your store’s branding while standing out enough to catch the shopper’s eye.
Choose contrasting colors to ensure visibility, but keep them aligned with your overall theme. Use concise, motivational copy, such as “Only $8 away from free shipping!”, to encourage user action. Keep it friendly, helpful, and goal-oriented.
Lastly, mobile test. Many shoppers use smartphones to browse and buy. Make sure your progress bar is fully responsive and doesn’t interfere with other elements on the page, particularly any sticky “Add to Cart” button, which is a common collision point on mobile product pages.
Where to Display the Free Shipping Progress Bar
Knowing how to add a free shipping progress bar to WooCommerce is only half the battle. You also need to decide where to display it for maximum effectiveness.
1. Cart Page
This is the most common location. The user is reviewing their items, so a nudge about free shipping can influence them to add more products.
2. Product Pages
Here, the bar can be used to set the expectation early. For instance, “Add items worth $45 more to get free shipping” can guide the shopping behavior from the start.
3. Mini Cart or Header
Some themes allow for custom widgets in headers or mini-carts. Displaying the progress bar here ensures users are always aware of how close they are to free shipping, even while continuing to browse other pages.
Being strategic about placement is just as important as the message itself. It ensures the user sees the progress bar during crucial decision-making moments.
Setting the Right Threshold
The dollar amount you choose matters as much as the visual design. Set the threshold too low, right at or slightly above your average order value, and you’re simply giving away shipping on orders you would have gotten anyway, cutting into margin for no behavioral gain. Set it too high, far beyond what a typical customer would realistically add to reach, and the bar reads as discouraging rather than motivating; shoppers give up rather than chase an unreachable goal.
A reasonable starting point is your current average order value plus 20 to 30%. If your average order sits at $40, a $50 to $55 threshold gives most shoppers a realistic, achievable nudge. Track your average order value before and after launching the bar, and adjust the threshold if you’re not seeing a meaningful lift within a few weeks. Many of the plugins listed above let you run more than one threshold tier, for example free shipping at $50 and a bonus gift at $100, which extends the same psychological mechanism further up the cart value.
A/B Testing Your Free Shipping Bar for Maximum ROI
To truly maximize your efforts, consider A/B testing different versions of your progress bar. Try variations in color, wording, placement, and thresholds. For example:
- “Get Free Shipping on Orders Over $50” vs “You’re $10 Away from Free Shipping!”
- Horizontal bar vs. circular gauge
- Placement above vs. below cart contents
Use a dedicated A/B testing tool or manual tracking with UTM parameters and your analytics platform’s goal tracking to measure performance. The data can help refine your bar’s design and messaging to get the best results.
Measuring Whether the Bar Is Actually Working
Installing a progress bar isn’t the finish line, confirming it moves the numbers you care about is. Before launch, record your baseline average order value and cart abandonment rate over at least a two-week window, ideally longer if your traffic is seasonal, so you’re comparing against a representative period rather than an unusually slow or busy stretch.
After launch, watch three numbers specifically: average order value, the percentage of orders that land just above your free shipping threshold (a spike here is a strong signal the bar is actively influencing behavior, not just decorating the page), and overall cart abandonment rate. If average order value climbs but abandonment doesn’t budge, the bar may be nudging existing buyers without doing much to rescue carts that were already headed for exit, in which case pair it with an abandoned cart email sequence for a fuller fix. If you have Google Analytics or a similar tool wired into WooCommerce, segment these metrics by device too, mobile shoppers often respond differently to on-page nudges than desktop shoppers do.
Mistakes to Avoid When Adding a Free Shipping Progress Bar
Even though the task seems straightforward, there are common pitfalls to watch out for. Avoid these when learning how to add a free shipping progress bar to WooCommerce:
- Overcomplicating the Message: Shoppers respond to simplicity. Don’t write a paragraph; keep your message to one line.
- Incorrect Threshold Calculations: Ensure that the bar updates in real time and correctly reflects the subtotal after discounts or coupons, a bar that doesn’t recalculate when a coupon is applied will actively mislead the customer.
- Clashing Colors: Poor color choices can make the bar hard to see or visually jarring.
- Ignoring Shipping Zone Rules: If your free shipping offer only applies to certain countries or regions, make sure the bar doesn’t promise free shipping to customers it doesn’t actually apply to, that’s a fast way to generate support tickets and chargebacks.
- Running an Unmaintained Plugin: Before installing anything, check the “last updated” date on the plugin listing. A shipping-bar plugin that hasn’t been updated in two or three years is a real risk once WooCommerce ships its next major cart/checkout change.
Avoiding these mistakes ensures a smooth, professional shopping experience that boosts conversions.

Frequently Asked Questions
Does WooCommerce have a built-in free shipping progress bar?
Not natively. WooCommerce supports free shipping zones, but the visual progress bar requires a plugin or custom code to display on the cart, checkout, or product pages.
Does the progress bar update in real time as customers add products?
Yes, most modern plugins use JavaScript or AJAX to update the bar dynamically as the cart total changes, without requiring a page reload.
Can I show the progress bar on product pages before anything is added to the cart?
Yes. Some plugins support displaying the bar on product pages with a static threshold message (e.g., “Spend $50 to unlock free shipping”) even before items are added.
Is “Free Shipping Bar by Beeketing” still a good option?
No. Beeketing discontinued its entire app suite in 2020, and the plugin is no longer maintained or supported. If it’s still active on an older store, replace it with one of the actively maintained options covered in this guide, running an abandoned plugin on your checkout flow is a real security and compatibility risk.
Closing Remarks: Your Next Steps for Increasing WooCommerce Conversions
Implementing a free shipping progress bar is more than a cosmetic upgrade, it’s a conversion strategy. Knowing how to add a free shipping progress bar to WooCommerce empowers you to guide customer behavior, increase average order value, and reduce cart abandonment.
Whether you opt for a plugin or a custom-coded solution, what matters is the psychology behind it: people love progress, and they love free shipping. Use this to your advantage, choose an actively maintained plugin, set a realistic threshold, and your WooCommerce store will reap the rewards.
Now that you’re equipped with the tools, strategies, and best practices, it’s time to implement this small but mighty feature on your WooCommerce store.
Interesting Reads:
Top 12 WooCommerce Referral & Loyalty Programs Plugins
How to Add Frequently Bought Together to WooCommerce
10 Best Software for Inventory Forecasting