How to Add WooCommerce to WordPress


Adding WooCommerce to an existing WordPress site is one of the few genuinely simple parts of running an online store, install a plugin, click through a setup wizard, and you technically have a working storefront within twenty minutes. That speed is exactly what trips up first-timers who mistake “technically live” for “actually ready.” What separates a store that’s live and a store that’s actually ready to take real orders is everything that happens after that initial install: hosting that can handle checkout traffic, payment gateways configured and tested, shipping that matches how you actually ship, and a launch checklist that catches the mistakes an eager first-timer tends to skip. Here’s the full path, not just the plugin install.
What WooCommerce Actually Adds to WordPress
WooCommerce is an open-source eCommerce plugin, free to install, that turns a WordPress site into a functioning online store. It adds product management (listings, variations, inventory), a shopping cart and checkout, payment gateway integration, shipping configuration, and order management, all running inside the WordPress admin you’re already familiar with. It powers a large share of the eCommerce sites currently running on the web, largely because it doesn’t require abandoning WordPress for a separate platform, it extends what’s already there.
Before You Install: Confirm Your Foundation Is Ready
A few things worth checking before adding WooCommerce, since fixing them after the fact is more disruptive than getting them right up front:
Hosting quality. WooCommerce is more resource-intensive than a basic blog or brochure site, database queries for products, cart sessions, order processing all add load your current hosting plan might not be built for. If you’re on a budget shared host meant for a simple content site, check whether it explicitly supports WooCommerce or consider upgrading before launch rather than discovering the limit during your first traffic spike.
SSL certificate. Non-negotiable for any store processing payments. Most hosts include free SSL through Let’s Encrypt these days, but confirm it’s active and that your site loads over HTTPS before you start accepting real transactions.
WordPress core version. WooCommerce tracks WordPress releases closely and drops support for older versions over time. Update WordPress core to current before installing WooCommerce, rather than fighting compatibility issues on an outdated install, since an old core version is one of the more common causes of a confusing, hard-to-diagnose plugin conflict.
Also Read: Is MailPoet by WooCommerce Free?
Step 1: Install and Activate the Plugin
From your WordPress dashboard, go to Plugins > Add New, search for “WooCommerce,” and confirm you’re installing the official plugin published by Automattic (the parent company behind WordPress.com and WooCommerce both). Click Install Now, then Activate once installation completes. WooCommerce will automatically redirect you into its setup wizard immediately after activation.
Step 2: Work Through the Setup Wizard Carefully
The wizard walks through several configuration screens, and it’s worth slowing down here rather than clicking through defaults on autopilot.
Store details. Your business address, currency, and the type of products you’ll sell (physical, digital, or both). This affects downstream defaults like whether shipping fields even show up on your products.
Industry and product types. WooCommerce uses this to suggest relevant extensions, worth answering accurately since it shapes what gets recommended, though you’re never locked into anything the wizard suggests.
Payment options. The wizard offers to connect common gateways (Stripe, PayPal, WooPayments) directly. Connect at least one here, even if you plan to add more later, since a store with no working payment method obviously can’t process a sale.
Shipping. Set up basic zones and rates matching your actual shipping reality, don’t leave this on a generic default if your actual costs differ meaningfully by region.
Recommended plugins. The wizard suggests extras like Jetpack or WooCommerce Payments. These are optional, evaluate each based on whether you actually need it rather than installing everything the wizard offers.
Step 3: Verify the Pages WooCommerce Created
WooCommerce automatically creates four core pages during setup: Shop, Cart, Checkout, and My Account. Check Pages in your dashboard to confirm all four exist and are published, not left as drafts. Then go to WooCommerce > Settings > Advanced and confirm each page is correctly assigned in the Page setup section, this is where a manual mistake (accidentally deleting one of these pages, or reassigning the wrong page) tends to surface, and it breaks the entire purchase flow if it’s wrong.
Step 4: Configure Your Theme
WooCommerce works with most WordPress themes since it hooks into standard WordPress template structure, but not every theme handles product page layouts, cart widgets, and checkout styling equally well out of the box. WooCommerce’s own Storefront theme is built specifically around it and is a safe, well-tested starting point if you’re not committed to a particular design. If you’re keeping an existing theme, check its documentation for explicit WooCommerce compatibility, and view your shop and product pages directly after activation to catch any obvious layout breaks before launch, an unstyled Add to Cart button or a cart icon that doesn’t match your header are common enough issues that they’re worth checking for specifically rather than assuming everything renders correctly by default.
Step 5: Add Your First Products
Go to Products > Add New. Give the product a clear title and a real description (not placeholder text), set pricing under the Product Data section, upload a proper product image rather than a stock placeholder, and configure the Inventory tab if you’re tracking stock. For products with variations (different sizes or colors), switch the product type to Variable Product and configure each variation’s own price and stock separately. Publish, then view the live product page exactly as a customer would to confirm everything displays correctly before adding the rest of your catalog.
Step 6: Configure Payments Properly, Not Just “Connected”
Connecting a payment gateway during the wizard isn’t the same as confirming it actually works. Go to WooCommerce > Settings > Payments and check each active gateway’s settings, are you in test mode or live mode, are your API keys correct, are the payment methods you want customers to see actually enabled. Run a real test transaction (most gateways offer a sandbox or test-card mode specifically for this) before switching to live mode and accepting real customer payments.
Step 7: Configure Tax Settings
Tax rules vary significantly by jurisdiction, and getting this wrong isn’t just a customer-experience problem, it can be a compliance one. Go to WooCommerce > Settings > Tax and either configure rates manually for the regions you sell into, or use a tax automation extension (TaxJar and Avalara are common choices) if your tax obligations span multiple states or countries with different rules. If you’re not confident about your tax obligations, this is worth a conversation with an accountant before launch rather than guessing.
Step 8: Run a Complete Test Purchase
Before announcing the store is live, walk through an entire purchase yourself, from browsing the shop page through checkout to the order confirmation email. Use a real (small) test transaction if your gateway allows it, or its sandbox mode if not. Confirm the order shows up correctly in WooCommerce > Orders, that stock decremented if you’re tracking it, and that the confirmation email actually arrived and looks right. This single test catches more launch-day surprises than any amount of settings-screen review alone, and it’s the step most first-time store owners are tempted to skip once everything looks fine on the surface.
Common Mistakes First-Time Setups Make
A few patterns show up repeatedly on stores launched in a hurry. Payment gateway left in test mode after launch, meaning real customers can “complete” a purchase that never actually charges anything. Shipping set to a generic flat rate that doesn’t reflect real costs, quietly eating margin on every order until someone notices. SSL not actually active despite the host claiming it’s included, checked by loading the checkout page directly and confirming the padlock icon shows in the browser. And product images left as placeholder or stock photos rather than real photography, which undercuts trust more than almost any other single detail on a new store.
Extending Beyond a Basic Physical Product Store
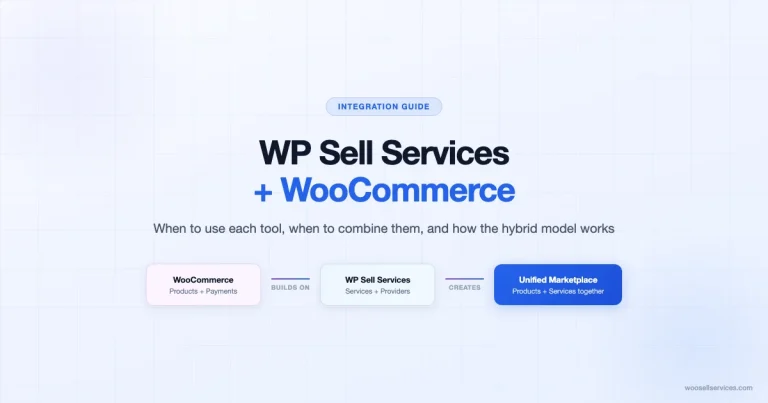
If what you’re actually selling doesn’t fit the standard physical-product mold, digital downloads, subscriptions, bookings, or services, the base WooCommerce install handles the checkout and payment layer but needs an extension matched to your actual business model. Trying to force a service business through a generic product listing, no shipping, no delivery timeline, no structured communication about scope, tends to create more manual work than it saves. If services make up the core of what you sell, WP Sell Services gives you tiered service packages and an order lifecycle built around delivery rather than shipping, worth evaluating during initial setup rather than retrofitting after you’ve already built a catalog around the wrong structure.
Mobile Testing Before Launch
A meaningful share of shopping traffic on most stores now arrives from phones, so testing on desktop alone leaves a real gap. Open your shop, a product page, and the full checkout flow on an actual phone, not just a browser window resized to look narrow. Confirm the Add to Cart button is easy to tap, product images load at a reasonable size without breaking the layout, and every checkout field is usable without the keyboard covering the submit button. Theme demos always look polished on the wide desktop screenshots used to sell them, the real test only happens on the device your customers are actually holding.
Migrating Products From Another Platform
If you’re moving from an existing store on Shopify, Etsy, or another platform rather than starting from zero, don’t manually recreate every product by hand if you can avoid it. WooCommerce’s built-in importer accepts CSV files, and most platforms offer a product export in a compatible format, or close enough that a spreadsheet cleanup gets it there. Migrating your catalog this way is dramatically faster than manual re-entry once you have more than a handful of products, and it reduces the chance of a typo silently changing a price or a SKU during the move. Test the import on a small batch first before running it against your entire catalog, so a mapping mistake affects five products instead of five hundred, and check that pricing, categories, and images all landed correctly before trusting the full import.
Choosing Hosting Built for WooCommerce Specifically
Not all WordPress hosting is created equal for a store specifically. Managed WooCommerce hosting plans exist precisely because a database-heavy, transaction-processing site has different resource needs than a static content site, more memory, better database performance, and often built-in caching that’s smart enough not to cache a customer’s cart or checkout session (a generic caching setup that caches those pages incorrectly can cause customers to see stale cart contents or, worse, another customer’s session). If you’re starting a new store rather than adding WooCommerce to an existing content site, it’s worth choosing hosting with explicit WooCommerce support from day one rather than migrating under pressure once traffic outgrows a generic plan.
Setting Up Analytics From Day One
It’s tempting to treat analytics as a later problem once the store is actually running, but the data you lose by skipping this at launch never comes back. Connect Google Analytics (or your preferred analytics tool) and confirm eCommerce tracking specifically is enabled, not just page-view tracking, before your first real order comes through. WooCommerce’s own built-in Analytics dashboard (under WooCommerce > Analytics) is worth checking too, it tracks orders, revenue, and product performance without needing a separate tool, and it’s already collecting data as soon as orders start flowing through the store.
Security Basics Worth Setting Up at Launch
A brand-new store is still a target the moment it’s publicly reachable, bots scan for vulnerable WordPress installs constantly regardless of how small or new a site is. Set strong admin passwords and enable two-factor authentication if your host or a security plugin supports it. Keep WordPress core, your theme, and every plugin including WooCommerce itself updated, most security issues on WordPress sites trace back to outdated software rather than a sophisticated attack. And install a basic security plugin (Wordfence and Sucuri are common choices) that at minimum handles login attempt limiting and basic malware scanning, this is cheap insurance relative to the cost of cleaning up a compromised store after the fact, and it takes far less effort to set up now than to recover a hacked site later.
A Pre-Launch Checklist
| Item | Why it matters |
|---|---|
| SSL active and confirmed on checkout page | Required for secure payment processing |
| Payment gateway switched from test to live mode | Test mode purchases don’t actually charge customers |
| Shipping zones match real shipping costs | Generic defaults often underprice or overprice shipping |
| Cart, Checkout, My Account, Shop pages all published | Missing or draft pages break the purchase flow |
| Real test purchase completed end to end | Confirms the entire flow actually works, not just each piece |
| Order confirmation email tested and readable | First direct communication a customer receives after buying |
Frequently Asked Questions
Can I add WooCommerce to a site that already has significant content and traffic?
Yes, this is common and generally low-risk since WooCommerce adds new functionality rather than modifying existing pages or posts. Test on a staging copy first if the site has meaningful traffic, to catch any theme or plugin conflicts before they affect live visitors.
How long does a proper WooCommerce setup actually take?
The plugin install and wizard take twenty minutes. A setup actually ready for real customers, tested payments, correct shipping, real product content, a complete test purchase, realistically takes anywhere from a few hours to a few days depending on catalog size and how many extensions you’re configuring.
Do I need a developer to set up WooCommerce?
Basic setup doesn’t require coding skills, the wizard and settings screens handle standard configuration. A developer becomes valuable for custom design work, unusual business logic, or integrations with external systems beyond what standard extensions cover.
Once WooCommerce Is Actually Ready
Adding WooCommerce to WordPress is the easy part. The plugin install and setup wizard get you a technically functional store in minutes. What actually determines whether that store is ready for real customers is everything covered above, hosting that can handle real traffic, payments tested in live mode, shipping that matches reality, and a complete test purchase walked through before you announce you’re open. Skip any of these and you’re not launching a store, you’re launching a demo that happens to be public.
Give the setup the time it actually needs rather than rushing to a launch date that doesn’t account for testing. A store that opens a week later but works correctly beats one that opens on schedule and loses its first customers to a broken checkout, and first impressions on a new store are much harder to earn back once a bad one sticks.
Interesting Reads
Shopify or WooCommerce: Which is Better?
How to Change the Order of Product Attributes for WooCommerce