How to Create a Waitlist in WooCommerce


Updated August 2026. E-commerce is more than just a digital storefront. It’s about creating experiences that captivate shoppers and convert them into loyal customers. Scarcity and anticipation are two psychological triggers that top-performing online retailers use to their advantage, and nothing embodies these better than a well-implemented waitlist.
If you’re running a WooCommerce-powered store and find yourself frequently out of stock on popular items, or if you’re launching a new product and want to gauge demand, it’s time to consider implementing a waitlist. But how do you set it up? And more importantly, how can you do it in a way that enhances customer trust, increases conversions, and streamlines your operations?
This post will explore everything you need to know about how to create a waitlist in WooCommerce. From understanding what a waitlist is to why it matters and the tools you need to implement it, we’ll walk you through the entire process step by step.

What Is a Waitlist in WooCommerce?
At its core, a waitlist is a system that allows customers to register their interest in a product that’s currently out of stock or not yet available. Instead of seeing a frustrating “Sold Out” message, customers can sign up to be notified when the product becomes available again.
When discussing how to create a waitlist in WooCommerce, we’re talking about integrating this functionality directly into your store. This can be done using plugins or custom code. Once implemented, customers can opt into notifications, giving you a reliable list of people to contact when the inventory is replenished.
Beyond inventory management, waitlists are also useful for exclusive product drops, early access sales, and market testing. If implemented creatively, a waitlist does more than just manage demand, it builds hype.
Why a Waitlist Matters: The Psychology of Demand
Have you ever wanted something more simply because it wasn’t available? That’s the scarcity principle at work. A waitlist leverages this principle brilliantly. When customers see that others are also interested in a product, it increases the item’s perceived value. It triggers urgency and a fear of missing out (FOMO), which can directly impact conversion rates.
Implementing a waitlist shows customers that you care about their experience. Instead of leaving them disappointed when something is out of stock, you offer them a promise of availability, and that builds trust. It keeps the customer connected to your brand rather than wandering off to a competitor’s store.
So, how to create a waitlist in WooCommerce that both nurtures leads and increases sales? The key is to use a smart tool that aligns with your business model and customer expectations.
How to Create a Waitlist in WooCommerce: Step-by-Step Instructions
Now, let’s get to the core of the topic, how to create a waitlist in WooCommerce effectively. Fortunately, WooCommerce’s extensibility makes it relatively straightforward with the help of plugins. Here’s a practical guide to get you started.
Step 1: Choose the Right Plugin
There are several plugins designed specifically to add waitlist functionality to WooCommerce. Popular options include:
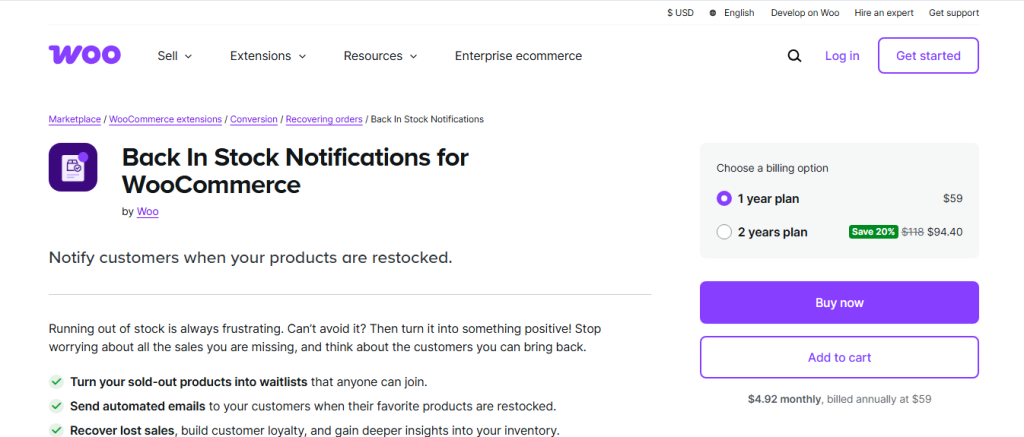
- YITH WooCommerce Waiting List
- WooCommerce Waitlist

Each plugin has its unique features, but the overall goal remains the same: to allow users to subscribe to out-of-stock products and notify them when those products are restocked.
After installing your preferred plugin via the WordPress dashboard, activate it and navigate to the plugin settings to customize how the waitlist will work on your site.
Step 2: Configure Waitlist Settings
Once your plugin is active, configure the settings to fit your store’s needs. For instance, you can:
- Choose the method of notification (email/SMS)
- Customize the message templates
- Set limits on how many customers can join the waitlist
- Enable waitlists for specific products or product categories
Make sure to test the system thoroughly. Use both a logged-in account and a guest account to see how the process works for different types of users.
Step 3: Monitor and Manage the Waitlist
Your plugin’s dashboard will provide a clear overview of all active waitlists. Here, you can:
- View how many users have joined each product waitlist
- Manually add or remove users
- Send out availability notifications when items are restocked
Don’t forget to sync this functionality with your inventory management system. If you’re using an ERP or stock manager plugin, ensure it communicates well with your waitlist plugin.
Writing Waitlist Notification Copy That Converts
The email that tells a customer their item is back in stock does more work than any other message in the waitlist flow, yet it’s often the most neglected. A generic “the product you wanted is now available” subject line gets buried in a crowded inbox. Naming the exact product and creating a light sense of urgency performs noticeably better: something like “Back in stock: [Product Name], but not for long” tends to outperform generic phrasing in open-rate testing across most WooCommerce stores that track this metric.
Inside the email, put the direct add-to-cart or buy-now link above the fold, don’t make the customer click through to the homepage and search again. Every extra step between the notification and checkout loses a percentage of interested buyers. If your plugin supports it, include the original price the customer would have paid and, if you’re running a small loyalty gesture, a modest discount code exclusive to waitlist subscribers. That combination, direct link plus a small reward for having waited, consistently produces the highest conversion rates in waitlist campaigns.
Waitlist vs. Pre-Order: Choosing the Right Mechanic
Store owners often conflate waitlists and pre-orders, but they solve different problems and send different signals to customers. A waitlist is reactive, it responds to a stockout that already happened, and doesn’t collect payment until the item is back and the customer completes a normal checkout. A pre-order is proactive, it collects payment (or at least a deposit) upfront for a product that hasn’t shipped yet, which works well for new product launches but carries real financial and legal obligations if the ship date slips.
If your stockouts are unpredictable and tied to supplier delays, a waitlist is the safer choice, no money changes hands until you can actually fulfill the order. If you’re launching something new and want to gauge and lock in demand ahead of manufacturing, a pre-order captures more commitment but requires clear communication about expected ship dates, since taking payment for an item you can’t deliver on time creates chargeback risk and, depending on your jurisdiction, potential consumer protection issues. WooCommerce Pre-Orders (the official Woo extension) and the Pre-Order for WooCommerce plugin by ClaudioSanches both handle the payment-collection side if you decide that model fits better.
Handling High-Demand Launches: A Real Example
A small skincare brand selling a limited-batch retinol serum through WooCommerce used to sell out within hours of every restock, with no way to capture the demand from customers who missed the window. After adding a waitlist plugin tied to that single SKU, they collected just over 2,400 email sign-ups across two months without a single unit in stock. When the next batch arrived, they staggered notifications in groups of 300 every fifteen minutes rather than emailing all 2,400 subscribers at once, which kept their hosting stable and prevented the kind of server crash that had happened during an earlier unmanaged restock announced on social media.
The batch approach also let them layer in urgency correctly. Customers in the first email group who didn’t purchase within thirty minutes had their reserved priority released to the next batch, which the plugin handled automatically through a first-come, first-served queue setting. The result was a 61% conversion rate from waitlist notification to completed purchase, well above the 15 to 20% range typical for a general newsletter blast, because every recipient had already expressed direct intent to buy that specific product.
The Benefits of a Waitlist for Your WooCommerce Store
Beyond managing inventory, a waitlist can become a powerful marketing and analytics tool. When you know exactly which products are in demand, it becomes much easier to make informed business decisions.
1. Predict Demand and Optimize Inventory
With a waitlist in place, you can identify bestsellers before even restocking them. This minimizes over-ordering and under-ordering, helping to reduce costs and prevent dead stock.
Furthermore, by analyzing waitlist trends, you can understand seasonal demand cycles and consumer preferences in real time.
2. Increase Conversions and Customer Retention
Customers appreciate being notified. It shows attentiveness and a commitment to service. This type of communication fosters brand loyalty, especially if you personalize the notification with customer names or exclusive discounts.
Moreover, customers on a waitlist are more likely to complete a purchase than cold visitors. They’ve already shown intent, making them prime candidates for upselling or cross-selling when the product returns.
Integrating Email Marketing with Your Waitlist
Don’t let the communication stop at “back in stock” alerts. Use the waitlist as a lead-generation funnel. Most waitlist plugins integrate with major email marketing tools like Mailchimp, Klaviyo, and ActiveCampaign.
Build Pre-Launch Buzz
When launching a new product, instead of offering it to everyone right away, consider offering it first to those on your waitlist. This creates a sense of exclusivity and rewards those who showed early interest.
Create segmented email campaigns targeting users based on their waitlist preferences. This lets you fine-tune your messaging, making it more relevant and persuasive.
Offer Special Incentives
Once an item is restocked, don’t just send a plain notification. Consider adding a time-sensitive discount to encourage quick action. Phrases like “You’re first in line” or “Limited stock available” can significantly boost click-through and conversion rates.
SEO and User Experience: Make Waitlists Work for Your Store
From an SEO perspective, enabling a waitlist feature can reduce bounce rates and improve engagement metrics. Customers spend more time on your site when they know they have a shot at getting what they want, even if it’s temporarily unavailable.
UX Tips for Effective Waitlist Implementation
- Clear Call to Action: Use bold and inviting “Join Waitlist” buttons instead of dull text links.
- Minimal Fields: Don’t ask for more than an email address unless necessary.
- Visual Feedback: Provide confirmation messages or animations to show that their request was successful.
These design tweaks go a long way toward making your site feel modern and customer-centric.
Mobile and Accessibility Considerations
A meaningful share of waitlist sign-ups happen on mobile, especially when a customer discovers a sold-out product through a social media link. Test your “Join Waitlist” button and form at a 390px viewport before launch, not just on desktop. A form field that’s too small to tap accurately, or a confirmation message that renders off-screen, will quietly cost you sign-ups that never show up in any error log because the customer simply gives up and leaves.
Accessibility matters here too. The waitlist form should be reachable by keyboard alone (tab to the email field, tab to submit, enter to confirm) and the confirmation state needs to be announced to screen readers, not just shown as a visual toast that fades after three seconds. Most well-built plugins handle this correctly out of the box, but if you’re customizing the form with a page builder, check that your custom markup didn’t strip the ARIA live region the plugin originally included.
Common Technical Pitfalls to Avoid
The most common failure mode with WooCommerce waitlists isn’t the sign-up form, it’s the notification trigger. Most plugins hook into the stock quantity field, firing an alert the moment quantity moves from 0 to any positive number. If your team restocks in a system that doesn’t sync to WooCommerce in real time (a separate warehouse management tool, for example), the plugin may fire notifications hours before the product is actually purchasable, sending customers to a page that still shows “out of stock” and eroding the trust you built by offering the waitlist in the first place.
A second pitfall is failing to cap notification batches. If a popular item restocks and five hundred waitlist subscribers all get an email at once, and all five hundred hit your product page within minutes, an undersized hosting plan can buckle under the traffic spike. If you expect a large waitlist on any given SKU, either stagger the notification send in batches or confirm your host can handle the concurrent load before the restock date.
Finally, watch for duplicate sign-ups. Guest users who sign up for a waitlist and later create an account with the same email sometimes end up in the list twice, which means they get double notifications and your reporting on true subscriber counts becomes unreliable. Most quality plugins de-duplicate by email automatically, but it’s worth confirming in your plugin’s settings rather than assuming.
Alternatives to Waitlists: When They May Not Be Ideal
Although waitlists are powerful, they’re not suitable for every situation. For example, if your product has highly uncertain restock times, using a waitlist might frustrate users instead of delighting them.
In such cases, consider offering alternative recommendations using product bundling or upselling techniques. Or use a pre-order system instead, which takes payment upfront with a specified delivery window.
Understanding when and how to create a waitlist in WooCommerce, and when not to, is key to leveraging its full potential.
Tracking and Analytics: Measure the Impact of Your Waitlist
To refine your waitlist strategy, you need to track key performance indicators (KPIs). Here are a few metrics worth monitoring:
- Waitlist sign-ups per product
- Conversion rates from waitlist notifications
- Time taken to restock
- Revenue recovered via waitlist emails
Pair this data with tools like Google Analytics and heatmaps to gain deeper insight into customer behavior.
You may find that certain products consistently outperform others, allowing you to double down on marketing or renegotiate terms with your suppliers.

Final Thoughts: Crafting the Ideal Waitlist Strategy
Successfully learning how to create a waitlist in WooCommerce is more than a technical task, it’s a strategic advantage. When executed correctly, a waitlist becomes a multifaceted tool that enhances customer satisfaction, drives sales, and provides critical market insights.
Use it to plan your stock better, grow your email list, and offer customers a smoother experience. Whether you’re launching a buzzworthy new item or managing high-demand products, a waitlist keeps you one step ahead of the competition.
Remember: anticipation isn’t just an emotion, it’s a marketing tool. Make the most of it.
Interesting Reads:
How to Add Frequently Bought Together to WooCommerce
How to Add a Free Shipping Progress Bar to WooCommerce
How to Add Live Sales Notifications in WooCommerce
Frequently Asked Questions
Does WooCommerce have a built-in waitlist feature?
No. WooCommerce does not include waitlist functionality by default. You need a dedicated plugin such as Back In Stock Notifier for WooCommerce, YITH WooCommerce Waiting List, or WooCommerce Waitlist to add this feature to your store.
Can guest users join a WooCommerce waitlist?
Yes. Most waitlist plugins support guest sign-ups via email address, without requiring an account. This keeps the barrier to entry low and captures interest from first-time visitors who haven’t registered yet.
How do I automatically notify waitlist subscribers when a product is back in stock?
Waitlist plugins typically hook into WooCommerce’s stock management. When inventory is updated from 0 to a positive number, the plugin triggers automated email notifications to all subscribers on that product’s list. Configure the notification template and sender details in the plugin settings.
Should I set a time limit on how long a customer stays on a product waitlist?
It’s good practice to expire waitlist entries after 90 to 180 days if a product never restocks. This keeps your subscriber counts accurate and prevents sending a notification to someone whose interest has likely faded months later. Most premium waitlist plugins support an automatic expiration setting.
Will a waitlist plugin slow down my WooCommerce store?
A well-coded waitlist plugin adds minimal overhead since the sign-up form only loads on out-of-stock product pages. The bigger performance risk is on the notification side: sending hundreds or thousands of restock emails in a single batch can strain shared hosting. Choose a plugin that supports throttled or batched sending, and confirm your hosting plan’s email-sending limits before a major restock.
Can I offer a waitlist for product variations, like a specific size or color, rather than the whole product?
Yes, and this is one of the more valuable configurations for apparel or variable products. YITH WooCommerce Waiting List and WooCommerce Waitlist both support per-variation waitlists, so a customer can join the list for “Size M, Blue” specifically rather than getting notified every time any variation of the product restocks, which keeps notifications relevant and reduces unsubscribe rates.